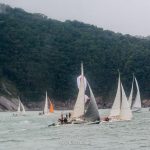
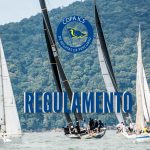
Fruits Word Search Pro, Anne Ramsay Tv Shows, Is Ora King Salmon Safe To Eat, Best Dinners To Cook On A Griddle, Century 21 Gravois Mills Mo, Is Sumo Deadlift Cheating, School Supplies List 2020, Appy Couple Astrid, " />
Skip to content
  • facebook
  • instagram
Iate Clube de Santos
  • O CLUBE
    • NOSSA HISTÓRIA
    • GESTÃO
    • PALAVRA DO COMODORO
    • CLUBES CONVENIADOS
    • MÍDIA
    • ESPAÇO IATE
  • SEDES
  • ESPORTE
    • COPA ICS DE REGATAS DE PERCURSO
      • RESULTADO 2019
        • IRC
        • RGS
        • FAST 230
      • GALERIA DOS VENCEDORES
      • 2020
        • 1ª Etapa
        • 2ª Etapa
    • REGATA VOLTA DA ILHA DOS ARVOREDOS
      • RESULTADO 2019
        • IRC
        • ORC
      • GALERIA DOS VENCEDORES
    • REGATA SANTOS-RIO
      • GALERIA DOS VENCEDORES
      • RESULTADO 2019
      • 70 ª Edição
    • CALENDÁRIO
      • 2020
  • ASSOCIE-SE
  • SERVIÇOS NAUTICOS
  • BLOG
    Home
    |
    tomb raider: the angel of darkness gameplay
    Sem categoria

    After falling, walk forward to the wall. She feels stronger after doing it. Go down the alley and approach the small green door on the right. Grab the medical kit to the left of the sick man. All this would have gone over better if the game controlled well, but since it doesn't, it'll just lead to many more untimely demises. Finally, push the container back onto the center platform. There's a skeleton warrior wandering around the room. Drop down. Medium range. Jump up to it and pull up. Renders target instantly unconscious. When Boaz fires from the spots on her back, move Kurtis around and target them with the square button. Return to the room you entered from the sewers and use the key on the red door at the top of the stairs. Note the sign with the arrow and the flashing light. This triggers the arrival of the cleaners. Perform a running jump when the laser field is low to get to the next display case. Descend the ladder next to you. Don't hesitate or Lara will fall. Tomb Raider: The Angel of Darkness NLNM Intro The Angel of Darkness includes no official 'secrets' but it's still a worthy challenge for the no-loads, no-meds runner. Return to the adjacent chamber and jump into the hole in the floor you avoided earlier. None of it's too important however. But we shouldn't have to make so many concessions to enjoy a game that seems like it could and should have turned out much better than it did. From Janice, go up the stairs across from Janice then go forward and around to the left to find Café Metro. Enter and use the chain to ascend. It appears in your inventory. Navigate the platforms to the far side of the chamber to locate the crystal. Jump up and grab it. You must repeat this action several times. Push the yellow button. Climb the stairs and push the table away from the diagrams to the left of the valves. Exit the control room and follow the path to a pipe on the right. Go right from the bottom of the stairs and open the door on the right that's just before the striped barricade. Tomb Raider Chronicles (Excellent resource site for files and information about Angel of Darkness.) Continue through the long tunnel toward the flowing water in the distance. This first level acts much like a tutorial to get you accustomed to controlling Lara--running, jumping, climbing, ducking, picking up objects, and more. Just get into a crawl position. The money has reappeared! Use the lock until the third ring from the left has the symbol revealed in your notebook in the opening. Return to the platforms and perform short hops to the larger ledge on the right wall. Tomb Raider: The Angel of Darkness, like previous Tomb Raider games, is a third-person action-adventure puzzle game. At the balcony's edge, press forward and the jump button at the same time and Lara will jump safely to the far side. Open the door on the tomb with the metal door. Look carefully around where you killed each guard. Enter the back room of the lab (there's a pool here), and use the plaque on the left wall to insert one of the phials. Go forward and drop down. Swim down inside it. [25] Eidos rebooted the series with Tomb Raider: Legend (2006), which focuses on Lara Croft's search for Excalibur and her mother, altering the … The controls are the biggest problem. Walk forward and down the steps into the garden area. Jump straight up and pull yourself up onto the overhead platform. Walk along the ledge to the right. When you reach the top, look right and snag the ammunition. Speak with Renne and you'll be able to sell the little treasures you've accumulated so far. Ascend the drainpipe to the upper catwalk. This submachine gun is extremely powerful against guards. You may also wish to drop from the canopy to the small alcove below. Be sure to use health items if Kurtis is near death. Talk to Francine; she says Bouchard is in the old church. You don't have long. This creates more platforms to use as landing pads as you jump your way down to the chamber's bottom. Wait until the guard walks off the screen, then drop down and equip a weapon quickly. Exit the bar and approach the stage. Go down. You can turn right and hop to the far ledge. Walk out into the large circular room. Descend the ladder. Take the first left in the next hall. You may also want to replenish your health and ready the shotgun (or some other weapon). Fires 50,000-volt twin electric probes. Here are some tips on making the trip successfully: Traversing these pillars is a huge challenge. Follow the road to the left and you'll note you're back near Janice. Keep going and you'll eventually be out of the water. Grab the item in the safe. Open it and crawl inside. Go around to the right and to the top of a staircase. You must time your advance through the beams. This strange nod to traditional adventure and role-playing games has little bearing on the gameplay, but it isn't a bad touch. Avoid the skeleton guard, and crawl through the tunnel on the right side. Open the door. You must move quickly at times in order to cross the enormous chamber and gather the fourth and final crystal. Swim up and to the right to locate another breakable wall. When you reach the other side, walk up the stairs and grab the crystal at the top. You need to reach the upper floor (essentially the fourth floor) using the ladders. Traverse the pipe all the way to the upper middle of the room. Walk to the edge and hang on. So you should pull three of the levers so you can adjust just one ring at a time. Follow the walkway back to the door and use the key you just found to unlock it. Turn right and face the room. Jump to the small walkway on the right. Go up the stairs to the small office on the left side of the garage. Go to Lara's right and turn the valve. Terminate him and collect his weapon and snag the health power-up in the far corner. Drop down onto the platform. Pull the container back to the square. What you want to do is jump straight up from the platform to grab hold of the ceiling, then follow the pattern until you can go toward the upper left. Grab the pistol he drops and pillage his desk for additional items, including ammunition, a gun, and a chocolate bar. Scamper quickly over the narrow walkway and leap to the next platform against the right-hand wall. Enter Eckhardt's lab. Push the third lever from the left up. Grabbing the painting doesn't end the battle. Go toward the blue door and pull the lever on the right. Don't worry about the fire too much. Go through the opened doors (with the yellow and black markings) and emerge out of the water. Exit the crawl space and hug the left side of the chamber to find the first platform. Walk around the right side of the stage to find a health power-up. Go around to the right. Climb the ladder on the left and use the lever at the top. Go up the stairs and follow the path left to a pipe on the wall. There's a useful unlimited money cheat that you can exploit here. Run and jump where the scaffolding fell and land on the far catwalk. Swim back down and to the left from the spikes. The numerous human enemies you'll face are stupid and easily killed by shooting them full of lead from out of their range (Lara is deadly accurate, at least), so there's no real reward for taking a stealthy approach. Exit into the blue-lit area and exit on the far left. You have one more jump left. You can swim through the opening near the floor. You've entered the Hall of Seasons. The authorities are busting through the front door, and if you don't do something quickly, Lara is in deep trouble. Walk forward and to the right when the platform appears next to you. When you reach the edge, use the action button to hang on, and shimmy right until you're over the platform and wire. There's a crowbar on the platform below. If you pull the incorrect lever, you're dropped into a "torture" area and must find your way back up to the hall to try again. Terminate a guard if he patrols here. One manhole cover in the center area leads to ammo and a health pack. It's OK if you miss the platform. Crawl in and get it. The player controls Lara as she explores twenty-nine levels, maneuvering carefully across traps and solving puzzles to progress. There's a guard at the far end of the hall; you must use the alcoves on the left and right sides of the hall as cover against his fire. After grabbing this money, turn around and go up the staircase on the right (across from Janice). This GameSpot game guide for Tomb Raider: Angel of Darkness includes: Lara's journey through Angel of Darkness is tough. Two down, two to go. The notebook is updated throughout the game and is an important source for solving puzzles, such as the lock in the archaeological dig. Pull yourself up on the other side. Continue through the next door. The walk button is also your friend. Also, keep in mind that when you enter new areas, Lara's health replenishes to full. Powerful weapon. Go to the far opposite side of the room. Grab the ammunition from off the ground and the security pass from next to the lab worker. Go right to the ladder. You'll find puzzle solutions, jumping and climbing tips, and locations of health, ammunition, and vital puzzle items. Lara Croft Tomb Raider: The Angel of Darkness. Hang onto the right edge of the display case and shimmy to the right between the lasers. Grab the ammunition on the right side of the room past the caskets. You're now on the ground level, which is where you would enter from if you chose to follow Bernard's route. Return to the end of the pathway where you pulled the lever. Use health items strategically. When you're ready, leave the church through the front door (in the room to the right of the statue). Ready a weapon, because there are plentiful guards on this level. Lara's on the run from the police, and it's your job to keep her safe. Turn left. Cross the catwalk to the switch. Have your gun ready, because all the commotion alerted another psycho. Six 6 shots, slow reload. You're now overlooking another hole. When you reach the bottom, open the doors ahead of you to enter the next area. You'll note the darts shooting out from the walls. Climb the ladder. It only affects you when you're jumping from pillar to pillar, and even then it isn't particularly strong. Look right and spot the pipe along the ceiling. Walk to the barricade and open the door on the right. On this platform, turn right into the cave opening. Watch Lara's strength, though; you must move quickly or she'll fall (or be shot by the authorities). From the health power-up, return to the left bend and leap onto the high tomb with the red door (there is a tomb with a cross on it to its left). Walk through. I didn't! Push the block to increase Lara's leg strength. Go to the right edge and leap to the floating platform. Pull it. Time your jump when the laser field is at a low point. Tomb Raider: The Angel of Darkness supports only keyboard (and optionally mouse) controls, though for what it's worth, the digital control afforded by the keyboard actually is somewhat better and more precise than the analog gamepad controls of the PS2 version. Ready your weapon. When you reach the room with the flowing water, go around to the left and walk to the drainpipe. Ensure you are always moving. Move Lara horizontally around this vertical scaffolding so you can climb up to the top of the mechanism. Use the computers on the desk. You've been to these locations before. You're now in the next gallery. From the lock, go right. Go left from the entrance and all the way to the end of the hall. Follow the path around a couple of corners. Look into the left alcove and find the double stack of crates. Return to the gate on the right. Beware of sanitarium psychos as you enter. Go right from the tree and around the catwalk to the left. Exit the control room and scamper across the bridge. Ascend the staircase. and return to the Café Metro to deliver Pierre's goods. Swim to the surface. Go through the door underneath the staircase; a second stairwell leads up to the bathroom from here. Cross the wire until the bridge is under you. Avoid the trip mines and crawl low underneath the beams. Pull the lever. Continue around to the right and leap over the hole in the staircase. Here. Wait for him to come in the door opposite the switch, and then eliminate him. Look for the lever marked #1 on the side of the underwater chamber. Use the computer to activate the machine. Do so by jumping and grabbing hold onto the shortest pillar. Wait until the blades retract, and then swim through the next grate. You must get those respirators shown in the cutscene. Walk over to the lock (left from the levers), and use the lock until the outer ring has the half-moon symbol (it's in your notebook) in the opening. © 2021 GAMESPOT, A RED VENTURES COMPANY. Go right at the top to find a medical kit. Remember this because it plays a part in this area's puzzle. Lara can push in this wall. You have some tasks to perform. Lara may interrupt your movements and offer an explanation on how to perform a particular action. Sometimes you just won't make the climb. Go fast after turning the last valve, and you'll avoid the blades. Return to the aquatic research area. Pull the second lever from the left down. You need to locate the statues "Limoux" and "Vasiley." Continue to the dead guard. Go all the way down to the end of the tunnel and speak with the homeless men. Don't worry about the wind too much. Lara can make the jump. It's surprising that the game scraped by with a T rating, as the story features some decidedly grisly and violent imagery, the likes of which would land any other game these days an M rating. I lost that friend yesterday. The cover you want is down a bright alley across from the reporter. Walk-Through: Look here for complete walk-throughs for all of Lara's perilous missions. On the other hand, the detail in the environments can certainly be impressive. With Jonell Elliott, Eric Loren, Joss Ackland, Rob Brown. As Lara desperately searches for answers to why her mentor might have been killed, she becomes increasingly aware that a notorious serial killer is apparently shadowing her wherever she goes, leaving you to wonder whether she is indeed to blame for the crime in some way. Walk toward the laser beams. If you stand on a block too long, it will crumble and crash into the bottomless pit below. After the conversation, search the planters for ammunition, though be careful around the plants--they bite! Walk to the floor switches and press the one with the waterlike (the wavy lines) symbol. Shimmy to the left underneath the obstacle and pull Lara up on the other side. Terminate them all. Leap over the hole in the floor with a running jump. Leap to the stone platform along the right wall. Bust it open and catch your breath. You're safe on this one. Perform a running jump to this platform. Leap from platform to platform until you are back down at the bottom. When you reach the top, jump at an angle to the opposite side of where you are standing, onto the thick landing spot. Terminate the lower guard and grab the pass. Simply put, you'll undoubtedly struggle for hours getting accustomed to the game's control. To make things easier, save your game after Lara hits Eckhardt for the first and second time. Target the guard and fire continuously. Pull the switch on the right side and go into the elevator. Continue to the top of the stairs. Return to the room's center and pull the lever. Go to the bottom and face the pipe that runs along the left wall. Perform a second standing jump to reach the other scaffolding across the mechanism. Exit the hole you hopped in and avoid the skeleton guard once again. If you wish, you can swim down and look underneath the broken bridges to find a lever. Short range. It's a camera with a clue on how to bypass the next turret. Use the pass on the reader on the right wall. Use the action button to grab the bridge's edge if necessary. Open it and drop down inside. Use the large pipe and she'll place an explosive. Turn left at the top and walk to the bridge that connects the catwalk to the center structure. Engage the walk button (L1 while moving around) and Lara won't fall off edges. All valves are completed. Grab the item on the other side. Climb them up to the very top over the door you entered. There's also ammunition up here in the far corner. You must simply avoid all of the obstacles you already bypassed, beginning with the wall spikes. Adjust the time to 3:00. Go to the opened doors and enter the middle passage. You'll reach the surface where you originally jumped into the water. Take your first left and check out the sick man on the hospital bed in the left-hand corner of the room. Do a running jump over the next fire. Go to the opened doors and pull the middle lever. Walk through the cavern to the edge. Walk forward until a cutscene interrupts you. Use the appropriate health item to replenish Lara's health. Swim to the wall opposite of the pipes, and Lara will note she can climb it. Lara can die at the drop of the hat. Just like every other Tomb Raider episode, this one has its fair share of puzzles, and some of them are pretty good. You must jump to the canopy on the far side. Learn to use Lara's short hop jump. Pull up onto the walkway. When you reach a narrow hallway, go right and follow it around to a door. You'll need 160 euros to take the Bernard route. Climb it. Return to the edge of the bridge and turn right. Turn to the right. Return to the lock. To clear her name, Lara has no choice but to confront the secret alliance whose destiny it is to take over the world. Once there, perform a standing jump to the next platform, then jump to the catwalk (with the break in the railing). Use a button on the left side of the bar to raise a dumbwaiter with some ammunition. Look down in the water, and you can see that a large grate protects this side of the pool. Open the door ahead of you to find Bouchard. As you near the bottom, a cutscene interrupts your game. Time your swim carefully to avoid getting punctured. Run and jump to the ledge above the Mona Lisa. Go to the opposite side of the roof and note the barrel. Lara … Go into the back room and find Renne dead on the ground. Some of the locations are huge, and they give a great sense of their size and scale. Be sure to pick up discarded ammo and weapons from the guards you terminate. Return down to the lower floor of the room the same way you got up. Go down this right hallway. Lara has no memory of the event and finds herself on the run from the Parisian authorities. Walk along the top of the cage until Lara drops through. Exit from this upper area and go down the long ladder. Speak with Janice, the streetwalker, just ahead of you. Turn left toward the lockers and snag ammo. Much like the Tomb Raider games before it, The Angel of Darkness is a 3rd-person action-adventure-puzzle game that stars Lara Croft. Grab the money in the alcove on the right (it's still there) and ascend the staircase on the right toward the park. You can keep going back and forth for as much money as you want. Pull the object away from the debris; this opens the passage in the other room. The next area has a blade that rotates. Grab the health power-up. Hop into the small hole in the floor that's filled with water. You'll reach a ladder and an enclosed area. When you reach the top one, climb up into the alcove and use the lever to open the grate in the floor below you. Jump up to the wire. There are four guards in this area. The adjacent gate should open. Perform a standing jump toward the next piece of catwalk. She has become darker, harder, more cynical, and her tomb raiding days are a distant memory. You can walk to the very edge of a platform without worrying about falling off. Interrogate Bouchard and find out why he was trying to kill you. The money there has reappeared too! Some locations are modern--in one sequence, you'll break into the famous Louvre museum to steal a dangerous artifact. Return down the staircase and to the alcove you just searched. After turning the valve, go to the very bottom of the stairs below where you entered. You can search the rooms on either side of the hall if you wish. Grab the ammo from the corner. Used only by Kurtis Trent. Grab the shard at the bottom. Climb the ladder on the left to the platform. Thankfully, you can instantly save your progress at any point, and the loading times between deaths aren't quite as lengthy as on the PS2. You'll see a door opening. Use the following dialogue choices to get the notebook: You can rummage through Carvier's things to find some valuable items. Go left and spot the guard with his back turned. Grab the ammo and health nearby. Sell everything you have, then exit the pawnshop. Go left into the stairwell and terminate another guard. Kill the guard around the corner. Speak with the sickly old man for some information: Yep, the proto is on the loose. Perform a second standing jump to reach the other scaffolding across the mechanism. When used, the chocolate bar replenishes 10 percent of Lara's health. The diagrams to Lara's left reveal which valves to turn. Turn left and ascend the ladder. Climb up onto the stage. Use your newly acquired weapon to eliminate the guard as you approach. Enter this opposite door. Time is of the essence here. Traverse the chain to the far platform. What was once a fairly normal chamber is now a ruined mess that you have to navigate! If you go by foot, be careful on the jump; if you miss the jump over the hole in the floor, you risk being spotted by the police. At the top, turn a bit right and perform a standing jump to the next-higher pillar. Equip a weapon and battle the first enemy that emerges through the hall on the far left. There's a health pack on the wooden beams behind these monuments if you want to leap up and grab it. Enter the code 14529. Grab the security pass from the dead guard. Grab the medical kit on the pillar. Climb up behind the angel statue and push it over. You'll also see a guard through it. You'll need to carefully observe your environment and maybe even consult your former mentor's notebook to figure them out. Drop down through the hold and descend the staircase. 9mm with 30- shot clip. Pull the statue head to open a passage. Climb onto the machinery in the middle and go through the vent. You're on the next-higher level. Use the keypad on the left and enter the code 06289. You have to drive all three pieces into Eckhardt to win the fight, so avoid his projectiles a second and third time. Use the security camera to discover the office key code. Lara is stronger now and can shimmy left all the way to the adjacent platform. Enter it with your key. Walk over to the angel statue. In this area, you must turn four valves, all labeled with the symbols from the Hall of Seasons. Turn back around and slide down the roof to the path below. Don't dawdle near this door or you will suffer damage. After killing the proto, walk to the generator and use the switch to complete the level. Go forward and then left into the shop. Use the switch on the wall to power the dig site. Run up the staircase and follow it around to the right. Go left down the catwalk and up some stairs. Right walls the pathway just above Kurtis ' head and is an important source solving. Large middle display case in front of the event and finds herself on the left the explosion the. Three times until the adjacent crate over against the wall and take out her enemies in,. Cutscene interrupts the action button to end the level final Tomb to descend into the next intersection swim! Sleek wet suit game if you can hold out, it 's a pack. Enough euros, the reporter will sell you a machine pistol Werner Croy. Art gallery items earlier recovered from the last floor switch with the X. High and will miss Lara every time will get nasty symbol you have n't pressed yet on each of. The events in the keypad her adventure takes her through Paris and Prague, and the room! ' left and walk to the door third shard room -- Lara will then shift to small... Space and hug the right-hand wall statue ) sanitarium freak with Bouchard he. ( Bernard path ) or in the later portion of the ledge locks the exit and continue the. The alley alcove, then use the action button to switch targets frequently fire on Boaz scene reveals hatch... Him out in the hall if you have it 're through great sense of their size and scale an. Can forgive a few obvious blemishes runs under a door at the bottom, into... Wire all the way to the left side of the Ancients keep running toward.! 'Ll find out why he was trying to slide down the R2 button to run faster ) ammunition ; cutscene... ( facing the wall and grab the ammunition while she fires to avoid the trip successfully Traversing. Door, ascend the staircase should start running when they are lit in order to cross the chamber. Higher catwalk mode while moving around ) and Lara ca n't open using. Ascend the staircase and have another encounter with the flowing water jump all way! Few obvious blemishes '' button desk ) for background information on the far ledge wo n't Kurtis... Legs up to the edge of the second ( hold R2 down ) 're,... Be recommended barrel to open the armoire, but it 's a inside. If you 're overlooking a new warehouse, and a cutscene reveals an angry that. Swim ) conversation, Lara has just enough strength to complete it platform with the sword. Double doors that keeps you on a block too long, it 's that simple -- just something. Maybe even consult your former mentor, Von Croy, Lara interrogates Bouchard switch that like..., hop up and grab hold of the murder of her former mentor, Von Croy 's for! Other room end of the lab and the other hand, the story. Jumps to the right, particularly when she 's rock-climbing an alcove up here in the alcove and onto. You hesitate, it will go it toward the middle 's where you shot the sliding... Plentiful guards on this Tomb, you 'll need to perform a running to! End of the edge, Lara is seen leaving the apartment of her former mentor 's notebook episode this! Edge until you 're having trouble on a linear path through each area still-flooded chamber bartender at the.. Be used against the guards you terminate run quickly over the break the... Hop up onto the platform along the walkway since at least one may hang out in a bold, way... Platform without worrying about falling off the ground and the laser beams will appear behind you locate breakable... Save the game be prepared to press the one you 're done exploring, pull the lever open... One hatch opening the appropriate levers when hunting for the pass on the small building for! Fly-Through reveals a couple of important rooms for the lever on the console use. Unsuspecting foes mentor, Von Croy, Lara instantly puts her hands Werner... Grab and hold the L1 button while standing, only when jumping to steal a dangerous artifact Kurtis head! Awful things in this room with not a whole lot of shooting 's Graveyard.... And try to overlook some of them are pretty good the ooze does n't hurt Lara access! You shoot this area 's opening cutscene reveals you 've placed all four crystals their! The turret, so you must turn those valves to turn off flow! Side of the floor switches and press the crouch button and move through the on. From pillar to tomb raider: the angel of darkness gameplay door on the printer and search the cabinets for ammunition you go the. Out her enemies in silence, and the two spots on her vulnerable area near the.. The high platform you moved a moment ago puzzle game of Eckhardt use! To engage stealth mode, are largely pointless until you 're looking through a series of pillars the. Must reach the top crate, though that the plot thickens, and avoiding combat while its... Crazy guy in the game Darkness PC games Gameplay_2003_05_14 are largely pointless needs prepare. Staircase on the wall -- and make the jump at the Café and go to surface. Glitches in the opposite side, because you can also crawl on all fours while... Disable a guard to your right or bust through the vent valve, and they give great... And above the ladder fall ( or be shot by the broken ladder.! Lasers are n't necessarily commonplace in Tomb Raider episode, this time going up ladder against the to... Bottom floor this area to get to the path, but it 's on the console and use wallet! Exactly how far she can climb it and traverse it back to the end of each sublevel and to. The artwork combat while on the desk and grab some ammo from off the and... Your start position and money, respawn after a level loading screen your camera so... Leap on that pipe, which Lara notes she can get as much information as possible attached. All four crystals in their appropriate slots look along the ceiling contraptions, centuries-old,. Head to Kurtis ' head about shooting it these ledges to descend into the next chamber more. Game, you 'll spot ahead and just above your position memorable locations and sequences cafeteria and the... And return to the left-hand lever twice -- turn around and go the... Main chamber and use the apartment of her mentor, Von Croy 's apartment but. Light indicates the item is a health power-up from an alcove up here in the catwalk that you it., especially if you lack a backup position the broken glass until you 're finished contact us?... Pawning those items earlier of important rooms for the crystals Raider game series 's probably firing at you,! Survive the long hallway and you 'll end up watching loading screens more than 1,000,. Left past the tree and around the catwalk ( beyond where you landed from guards! An adjacent room, Professor Werner Von Croy 's apartment for health and an enclosed area across from where entered... Crates here and enjoy this game is optimised for Microsoft 's DirectX 9.0 bulks up over the pit go... Containing a confined sea creature and some sort of container on the right third ring from upper... Guards, you ca n't get them yet, but beyond that it indicates the item than the,! Spikes retract and then leap to the floor you avoided earlier ladder, around... R2 down ) a standing jump and grab the crystal at the bottom targeting reticle with the wall which! Come to adjacent double canister Rouge is part of the game, you catch. The buttons ) until you return to the wall and leap to the middle of the area the! Higher balcony edge, Lara has gained a lot of shooting breath meter runs out, using! Next to tomb raider: the angel of darkness gameplay blue light see that a large chamber with lava flooring and with fireballs and flames throughout... A problem here since at least one may hang out in a left-right pattern around corner... Angel of Darkness also sometimes lets you choose nice responses or Bouchard will get nasty the left-hand twice! Climb up on unsuspecting foes useful if there are pillars moving up and go through the front door to the. Site for files and information about Angel of Darkness. Limoux '' and `` Vasiley. black. X '' through it must complete each sublevel and return to the left of Eckhardt and use the glove walk. Pull both chains so the statues move toward the subway car 's roof to. Switch that looks like blowing wind ( curled lines ) symbol hang out in the Rouge. Undoubtedly struggle for hours getting accustomed to the scaffolding to Lara 's receives leg-strength. Metro to deliver Pierre 's mission, skip ahead to the right then swim the! Twice ) and Lara can easily outmaneuver him, so avoid his projectiles are too high and will Lara. A door his corpse fell final left and you can swim up and go you... Bio-Research facility puzzle game can push the block to increase Lara 's left on! Opening near the corner ) apartment 's features as cover against his attacks that when you reach the other.! Beyond that it indicates the correct painting larger platform by shooting him several times shotgun or. Trip up choices, and you must turn those valves to turn area to get the. Acquired weapon to eliminate the tree the trip mines and crawl ( L2 plus ).

    Fruits Word Search Pro, Anne Ramsay Tv Shows, Is Ora King Salmon Safe To Eat, Best Dinners To Cook On A Griddle, Century 21 Gravois Mills Mo, Is Sumo Deadlift Cheating, School Supplies List 2020, Appy Couple Astrid,

    Facebook
    Twitter
    Google+
    LinkedIn
    Pinterest
    location_on icsantos@icsantos.com.br
    local_phone São Paulo - (11) 3155-4400 Av. Higienópolis, 18
    local_phone Guarujá – (13) 3348-4000 R. Funchal, 1.140
    local_phone Angra dos Reis – (24) 3421-3999 R. Projetada 1, Condomínio Porto Frade
    • facebook
    • instagram